Finally, after all the researching, the math reviews, the discussions, the coding, the testing, the back-tracking, it's ready - 0.3 Release.
Before talking about the final stretch to get the release done, lets see what's actually been done:
Modified the Model.js to include the following 2 functions
o getVertices(): returns the vertices of the object
o getBoundingBox(aabb): Returns an array of the min/max XYZ values for the bounding box after it's been scaled
Made Picking.js
o Disabled right-click menu on canvas
o Creates the mouse vector from the camera to the far clipping plane
- 2 main variables: Mouse Origin and Mouse Direction Vector
o Ray-Bounding Box Intersection Test
- Takes the min/max XYZ values of the bounding box, mouse origin and direction vector
- Returns true if intersect
- Need to transform the mouse origin and direction vector into the object's space before performing test
o Sorts the intersecting objects from closet to furthest from the camera
o Returns an array of object index in the scene
So, to continue from the previous blog, the correct mouse vector has finally been constructed and we've got ourselves a mouse origin and a mouse direction vector. The next part, which is the most important part was to construct a ray-box intersection test. I've found myself 3 different ray-box intersection algorithm and tried to implement them all, but they don't seem to work properly - only works in specific cases.
On Tuesday, went in to work with Andor. We've looked at the codes and did some more research. In the process, I've played around with the transformations and tried the tests again. Finally, it works. So what's been done now, is that I used one of the AABB tests, and to make it work properly, this is what needs to be done:
1) Get bounding box that's axis-aligned (not transformed)
2) Find the inverse of the object's transformation matrix
3) Apply the inverse transformation matrix to the mouse vector (brings the mouse vector into the object's space)
4) Pass in the values into the test
So now I simply run this test through all the objects in the scene and I've got myself a basic picking function. Afterward, I simply sorted the objects from closest to furthest. And to do that, I did some math and calculated the objects distance from the camera position and compared them.
At the end of the picking function, I had it returned an array of index of the objects in the scene.
During today's Skype meeting, I've updated everyone about the progress of the picking and told them where it's at. As it is, with the bounding box test working fine (even when objects are rotates, scaled, or moved the camera around), they are willing to add this into their next release. However, I will try to make this picking function better by implementing the ray-triangle intersection test and hopefully get this finish before their release, if not, they can add it to their next release.
As of now, my 0.3 Release is done, but I will continue to work on it to make it better. And when I get it done, I will post a more updated version of the picking function on the wiki page and have it be included in the next C3DL release.
Thursday, December 11, 2008
Monday, December 8, 2008
0.3 Progress Update
Why-oh-why must I test my code so much? What happened? Oh nothing....I basically just had to redo whatever I've had for the mouse vector. However, I managed to make the process of calculating the mouse vector in fewer lines and faster time.
You can ignore all the previous calculations like finding the distance of the camera to the close/far clipping plane using trig, scaling the vector by the ratio, calculating inverse matrix, and everything else that's be done before.
Now, everything's simple. 1 simple trig, and a couple of multiplications and divisions, and we're done. So basically, I just scratched what I've done in the past....2 weeks and went back to what I had originally done in the beginning of the project.
1) Find the dimensions of the far clipping plane
2) Find the ratio between the far clipping plane and the canvas window size
3) Finding the x,y coordinates of the mouse on the canvas window relative to the far clipping plane. And use the distance between the camera and the far clipping plane as the z value.
To make the mouse vector be relative to where the camera is, we simply make the viewMatrix of the camera and multiply our mouse vector with it.
So now, wherever I rotate or move my camera to, the mouse vector will always be shooting from what we see from where the camera is to where we see as the far clipping plane in the back of the canvas.
How did this process get simplify to such an extend, I must thank Cathy and our 1 hr discussion we had and all the diagrams we kept drawing on the white board. That discussion really helped me get a clear image of how the 3D world is shown in that 2D canvas window. What was causing the main problem for having the mouse vector always being skewed towards the center, is because we ended up doing multiple matrix transformations. For what we see on the canvas, the 3D space that we see (perspective) has already been skewed (transformed) so it's in a more rectangular form than a triangle, and then flatten before being put on the screen. I've drawn a simple diagram to show what's been done from a bird's eye view(please excuse the poor drawing).
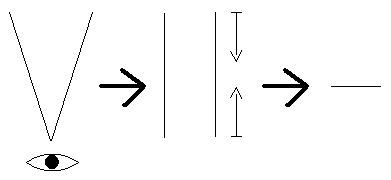
1) What we see in 3D space
2) Skewed (Perspective) and then Compressed
3) 2D (Canvas/Screen)
At least this is my understanding of it. And now that the mouse vector works properly, and FINAL (maybe minor improvements), I have to do the following:
1) Decide on an appropriate intersection test (have 2 right now)
2) Need to aligned mouse vector with testing object before testing intersection
3) Aligned object and mouse vector to axis to perform AABB test (Axis-Aligned Bounding Box)
I hope tomorrow's session with Andor will get these done. And afterward, I want to make the test do a more thorough intersection test rather than just the bounding box.
You can ignore all the previous calculations like finding the distance of the camera to the close/far clipping plane using trig, scaling the vector by the ratio, calculating inverse matrix, and everything else that's be done before.
Now, everything's simple. 1 simple trig, and a couple of multiplications and divisions, and we're done. So basically, I just scratched what I've done in the past....2 weeks and went back to what I had originally done in the beginning of the project.
1) Find the dimensions of the far clipping plane
var farWidth = 2 * ((C3DL_FAR_CLIPPING_PLANE) * Math.tan(degreesToRadians(0.5 * C3DL_FIELD_OF_VIEW)));
var farHeight = farWidth * (tempDiv.height/tempDiv.width);
2) Find the ratio between the far clipping plane and the canvas window size
var wRatio = farWidth / tempDiv.width;
var hRatio = farHeight / tempDiv.width;
3) Finding the x,y coordinates of the mouse on the canvas window relative to the far clipping plane. And use the distance between the camera and the far clipping plane as the z value.
var farX = (currX / tempDiv.width) * farWidth;
var farY = (currY / tempDiv.height) * farHeight;
var farZ = C3DL_FAR_CLIPPING_PLANE - camPos[2];
To make the mouse vector be relative to where the camera is, we simply make the viewMatrix of the camera and multiply our mouse vector with it.
viewMatrix = makePoseMatrix(scn.getCamera().getLeft(), scn.getCamera().getUp(), scn.getCamera().getDir(), scn.getCamera().getPosition());
var tempMouseVec = makeVector(farX, farY, farZ);
tempMouseVec = multiplyMatrixByVector(viewMatrix, tempMouseVec);
So now, wherever I rotate or move my camera to, the mouse vector will always be shooting from what we see from where the camera is to where we see as the far clipping plane in the back of the canvas.
How did this process get simplify to such an extend, I must thank Cathy and our 1 hr discussion we had and all the diagrams we kept drawing on the white board. That discussion really helped me get a clear image of how the 3D world is shown in that 2D canvas window. What was causing the main problem for having the mouse vector always being skewed towards the center, is because we ended up doing multiple matrix transformations. For what we see on the canvas, the 3D space that we see (perspective) has already been skewed (transformed) so it's in a more rectangular form than a triangle, and then flatten before being put on the screen. I've drawn a simple diagram to show what's been done from a bird's eye view(please excuse the poor drawing).

1) What we see in 3D space
2) Skewed (Perspective) and then Compressed
3) 2D (Canvas/Screen)
At least this is my understanding of it. And now that the mouse vector works properly, and FINAL (maybe minor improvements), I have to do the following:
1) Decide on an appropriate intersection test (have 2 right now)
2) Need to aligned mouse vector with testing object before testing intersection
3) Aligned object and mouse vector to axis to perform AABB test (Axis-Aligned Bounding Box)
I hope tomorrow's session with Andor will get these done. And afterward, I want to make the test do a more thorough intersection test rather than just the bounding box.
Wednesday, December 3, 2008
Solving other problems, help find hidden mistakes
After some more testing, I've realized that there were some major problems I need to fix before proceeding any further:
1) the center point (0, 0) on the canvas has some offset (about 3 pixels) in the browser
2) the (x, y) point of the mouse has not been converted from pixel to 3D coord
To quickly fix the first problem, I borrowed some code from a sample C3D demo:
As for the second problem, it took a little bit to figure out, but then I've came up with a temporary solution. I simply applied the same idea for getting the width of the far clipping plane, except here, I'm using the distance from position of the camera to the point it is looking at. And with that, I've calculated the ratio of the canvas to the actual space.
Now, this temporary solution only works when the object is at the look at position. So now I need to fix it so it'll work for objects at any position.
While coding this part, Andor and I also found a mistake that might have been causing a lot of problems from before. When we were calculating dz in the beginning, we did this:
Mathematically, it seems right, but then we realize that the Math.tan needs to take a radian and not a degree number, so we quickly fixed that by changing it to:
Luckily we saw this as we were making the pixel to 3D coord conversion, otherwise, we might have been stuck for a long time later on without realizing the problem has been there from the very beginning.
1) the center point (0, 0) on the canvas has some offset (about 3 pixels) in the browser
2) the (x, y) point of the mouse has not been converted from pixel to 3D coord
To quickly fix the first problem, I borrowed some code from a sample C3D demo:
function findPos(obj) {
 var curleft = curtop = 0;
 if (obj.offsetParent) {
  do {
   curleft += obj.offsetLeft;
   curtop += obj.offsetTop;
  } while (obj = obj.offsetParent);
  return [curleft,curtop];
 }
}

function getXandY( event )
{
 var tempDiv = document.getElementsByTagName('canvas')[0];
 var coords = findPos(tempDiv);
 // determine the correct X, Y
 var X = ( ( event.clientX - coords[0] ) + window.pageXOffset )  - (tempDiv.width / 2.0);
 var Y = (tempDiv.height / 2.0) - ( event.clientY - ( coords[1] - window.pageYOffset ) );

 return [X,Y];
}
As for the second problem, it took a little bit to figure out, but then I've came up with a temporary solution. I simply applied the same idea for getting the width of the far clipping plane, except here, I'm using the distance from position of the camera to the point it is looking at. And with that, I've calculated the ratio of the canvas to the actual space.
var camDist = Math.sqrt(Math.pow(camPos[0] - camLook[0], 2) + Math.pow(camPos[1] - camLook[1], 2) + Math.pow(camPos[2] - camLook[2], 2));
var midSpaceWidth = 2 * (camDist * Math.tan(degreesToRadians(theta));
var ratio = midSpaceWidth / tempDiv.width;
var tempX = ratio * currX;
var tempY = ratio * currY;
Now, this temporary solution only works when the object is at the look at position. So now I need to fix it so it'll work for objects at any position.
While coding this part, Andor and I also found a mistake that might have been causing a lot of problems from before. When we were calculating dz in the beginning, we did this:
var dz = dx / Math.tan(theta);
Mathematically, it seems right, but then we realize that the Math.tan needs to take a radian and not a degree number, so we quickly fixed that by changing it to:
var dz = dx / Math.tan(degreesToRadians(theta));
Luckily we saw this as we were making the pixel to 3D coord conversion, otherwise, we might have been stuck for a long time later on without realizing the problem has been there from the very beginning.
OSD Lab Reviews
Just like the previous labs, our last lab of the course did not turn out to be as difficult as I thought it might be. With the detailed instructions given, the lab was completed pretty smoothly. The main trouble I had was still the overall structure of where everything goes. Unfortunately, my previous and current project did not have much to do with plugin/extension, and hence the lack of knowledge and understanding of the tree structure was present. Other than that, everything was pretty much as easy as 1-2-3.
Afterwards, I've decided to look back at all the previous labs to make sure I didn't miss any of them. There was the:
• Ubiquity
• Mozilla Build Lab
• Patches Lab
• Thunderbird Bug posted on Bugzilla with Thunderbird Fix
• Mozilla Tab Patch Lab
• Mozilla Extension Lab
• XPCOM Component Lab
• Chrome Lab
As can be seen, the class has really gone a long way. Started with being introduced to add-ons, to building FireFox, to making and submitting patches. The only thing that I think could have been better was for the labs to be assigned earlier in the course instead of near the end. Because for people who were actually working with FireFox projects, I'm pretty sure they've been doing those things already. But for people like me, who worked on projects outside of FireFox, it truly was an interesting experience.
Monday, December 1, 2008
So Close Yet So Far
After spending the Friday afternoon with Andor trying to find ray-box intersection samples, we've finally narrowed it down to 3-4 tests to try.
- From www.blitzbasic.com
- Notes from University of Utah
- From 3D Programming Weekly
- And samples from "3D Game Engine Architecture" by David H. Eberly
Spending the weekend trying out the different sample tests, starting from what seemed the simpliest (blitzbasic), I've found the code from 3D Programming to work close to what I needed. This code is mainly used for testing AABB (Axis Aligned Bounding Box), and so, when the camera is set at positions that is not aligned with an axis, it doesn't work.
This test involves 3 separate functions:
Knowing that this test is for AABB, I've tested it to make sure that it at least works when being aligned at an axis at a time. Now, I need to figure out which of the suspected issue is causing the test failure:
- Applying transformation matrix to either box, ray, or camera
- The initial conversion of 2D to 3D coord of mouse is wrong
- Other unnoticeable bugs
But before I look for these errors, I think I will try out the other tests to see if they work any better. And maybe having another session with Andor will clear things up.
- From www.blitzbasic.com
- Notes from University of Utah
- From 3D Programming Weekly
- And samples from "3D Game Engine Architecture" by David H. Eberly
Spending the weekend trying out the different sample tests, starting from what seemed the simpliest (blitzbasic), I've found the code from 3D Programming to work close to what I needed. This code is mainly used for testing AABB (Axis Aligned Bounding Box), and so, when the camera is set at positions that is not aligned with an axis, it doesn't work.
This test involves 3 separate functions:
// fDst1 and fDst2 are the distance between P1/P2 and the bounding box
// Hit is use to store where the intersection point is
function GetIntersection(fDst1, fDst2, P1, P2, Hit) {
  if ((fDst1 * fDst2) >= 0) return 0;
  if ( fDst1 == fDst2 ) return 0;

  var tmp = new Array();

  tmp[0] = P1[0] + (P2[0]-P1[0]) * ( (-1.0 * fDst1) / (fDst2 - fDst1) );
  tmp[1] = P1[1] + (P2[1]-P1[1]) * ( (-1.0 * fDst1) / (fDst2 - fDst1) );
  tmp[2] = P1[2] + (P2[2]-P1[2]) * ( (-1.0 * fDst1) / (fDst2 - fDst1) );

  Hit = tmp;

  return Hit;
 }

// Checks to see if the Hit point is in the box and which axis it's aligned with
function InBox( Hit, B1, B2, Axis) {
  if (Hit != 0) {
   if ( Axis==1 && Hit[2] > B1[2] && Hit[2] < B2[2] && Hit[1] > B1[1] && Hit[1] < B2[1]) return 1;
   if ( Axis==2 && Hit[2] > B1[2] && Hit[2] < B2[2] && Hit[0] > B1[0] && Hit[0] < B2[0]) return 1;
   if ( Axis==3 && Hit[0] > B1[0] && Hit[0] < B2[0] && Hit[1] > B1[1] && Hit[1] < B2[1]) return 1;
  }
  return 0;
 }

// Check whether the line hit the box or not
function CheckLineBox(B1, B2, L1, L2, Hit) {
  if (L2[0] < B1[0] && L1[0] < B1[0]) return false;
  if (L2[0] > B2[0] && L1[0] > B2[0]) return false;
  if (L2[1] < B1[1] && L1[1] < B1[1]) return false;
  if (L2[1] > B2[1] && L1[1] > B2[1]) return false;
  if (L2[2] < B1[2] && L1[2] < B1[2]) return false;
  if (L2[2] > B2[2] && L1[2] > B2[2]) return false;
  if (L1[0] > B1[0] && L1[0] < B2[0] &&
   L1[1] > B1[1] && L1[1] < B2[1] &&
   L1[2] > B1[2] && L1[2] < B2[2])
   {Hit = L1;
   return true;}
  if ( (InBox( GetIntersection( L1[0]-B1[0], L2[0]-B1[0], L1, L2, Hit), B1, B2, 1 ))
    || (InBox( GetIntersection( L1[1]-B1[1], L2[1]-B1[1], L1, L2, Hit), B1, B2, 2 ))
    || (InBox( GetIntersection( L1[2]-B1[2], L2[2]-B1[2], L1, L2, Hit), B1, B2, 3 ))
    || (InBox( GetIntersection( L1[0]-B2[0], L2[0]-B2[0], L1, L2, Hit), B1, B2, 1 ))
    || (InBox( GetIntersection( L1[1]-B2[1], L2[1]-B2[1], L1, L2, Hit), B1, B2, 2 ))
    || (InBox( GetIntersection( L1[2]-B2[2], L2[2]-B2[2], L1, L2, Hit), B1, B2, 3 )))
    {
   return true;
    }
  return false;
 }
Knowing that this test is for AABB, I've tested it to make sure that it at least works when being aligned at an axis at a time. Now, I need to figure out which of the suspected issue is causing the test failure:
- Applying transformation matrix to either box, ray, or camera
- The initial conversion of 2D to 3D coord of mouse is wrong
- Other unnoticeable bugs
But before I look for these errors, I think I will try out the other tests to see if they work any better. And maybe having another session with Andor will clear things up.
Tuesday, November 25, 2008
0.3 Progress
Today, I had another working session with Andor on the Picking project. With the help of the newly made C3D demo page, we managed to make a big step forward.
So now, we've changed the way we were converting the mouse window coord into 3D vector back into calculating with trig. Before the change, we were
1) Converting windows coord to NDC
2) NDC to Viewspace
The
3) Viewspace to Model
modelMat x viewCoord
modelMat is a 4x4 matrix and viewCoord is a 4 value vector.
So what we did now instead, is back to using trig to calculate the distance from the camera position to the far clipping pan, and using that, we can calculate the dimension of it using ratio of the canvas dimension. And what we end up having in code now, is implementing Jeremy's idea of
1) Find distance to project plane
2) Make the vector of mouse picked point
3) Calculate the scale value to change the vector length to reach the far clipping plane and apply it to mouse vector
4) Orient the mouse vector to match our current camera view
Now, what we have here, is a vector of 3 value, which is the ending point of our mouse vector. In other words, this is the 3D coordinate of the point on our mouse vector intersecting the far clipping plane.
The next step now, is to try and make the actual line for this mouse vector, and do some initial intersection test for the line and the objects in the scene. After some time, Andor suggested that I try applying the object's trans matrix onto the mouse vector, and from that, we'd have both vector and object within the same space (model space). In that, we can then proceed to doing a bounding box check, and after that, I can do the actual object's intersection test.
What I need now, is
1) Mouse Vector Equation
2) Bounding Box/Object Face's Plane Equation
3) Equation for testing line/plane intersection
Onto testing and math review I go now...
So now, we've changed the way we were converting the mouse window coord into 3D vector back into calculating with trig. Before the change, we were
1) Converting windows coord to NDC
var Cx = ((2 * currX) / ( tempDiv.width)) - 1 ;
var Cy = (2 * currY) / tempDiv.height;
var Cz = (2 * currZ) - 1;
var Cw = 1;
2) NDC to Viewspace
var viewCoord = multiplyMatrixByVector(projMatInv, new Array(currX, currY, currZ));
viewCoord[2] = -5;
viewCoord[3] = 6;
The
multiplyMatrixByVector only calculates 3x3 matrix and a vector of 3 values. Therefore, the 3rd value will be calculated wrong and the 4th value will never be calculated. What we assumed here, is that the projMatInv never changes (since it's something we define), and with it, the 3rd and 4th value will always be calculated to be -5 and 6.3) Viewspace to Model
modelMat x viewCoord
modelMat is a 4x4 matrix and viewCoord is a 4 value vector.
So what we did now instead, is back to using trig to calculate the distance from the camera position to the far clipping pan, and using that, we can calculate the dimension of it using ratio of the canvas dimension. And what we end up having in code now, is implementing Jeremy's idea of
1) Find distance to project plane
var dx = 0.5 * tempDiv.width;  // tempDiv.width is canvas width
var theta = 0.5 * C3DL_FIELD_OF_VIEW;  // angel of view in degrees
var dz = dx / Math.tan(theta);  // distance
2) Make the vector of mouse picked point
var vPick = makeVector( currX, currY, dz );
3) Calculate the scale value to change the vector length to reach the far clipping plane and apply it to mouse vector
var scale = (C3DL_FAR_CLIPPING_PLANE - C3DL_NEAR_CLIPPING_PLANE) / dz;
vPick = multiplyVector(vPick, scale);
4) Orient the mouse vector to match our current camera view
viewMatrix = makePoseMatrix(scn.getCamera().getLeft(), scn.getCamera().getUp(), scn.getCamera().getDir(), scn.getCamera().getPosition());
vPick = multiplyMatrixByVector(viewMatrix, vPick);
Now, what we have here, is a vector of 3 value, which is the ending point of our mouse vector. In other words, this is the 3D coordinate of the point on our mouse vector intersecting the far clipping plane.
The next step now, is to try and make the actual line for this mouse vector, and do some initial intersection test for the line and the objects in the scene. After some time, Andor suggested that I try applying the object's trans matrix onto the mouse vector, and from that, we'd have both vector and object within the same space (model space). In that, we can then proceed to doing a bounding box check, and after that, I can do the actual object's intersection test.
What I need now, is
1) Mouse Vector Equation
2) Bounding Box/Object Face's Plane Equation
3) Equation for testing line/plane intersection
Onto testing and math review I go now...
0.3 Updates
Although the theory behind picking is known and understood, but the actual work for it seems much harder than I thought it'd be.
At first, I used trigonometry to calculate the projected vector from the point where the mouse was clicked on the canvas, and aimed it directly to the back of the scene. Before I read the documentations on the stages of transformation, I thought this had produced the correct vector. But now that understood the stages, what I have actually created was a vector in Perspective View. So, instead of using trig, I approached it differently and try converting the mouse coord through the different stages of transformation to get to 3D Space.
After following the steps to converting 3D coordinates from 2D:
1) Windows Coord -> NDC
2) NDC -> Viewspace
3) Viewspace -> Model
The results doesn't seem to look accurate. The math calculation done was double checked and they were correct, but it seems that the numbers used are performing incorrect transformations.
Since the existing benchmark was hard to test out the picking functionality, I have now created a custom Canvas 3D demo that's more suitable for testing it. Now, I can actually draw the testing scenario on paper, and actually have it tested out in the demo.
Tuesday, November 18, 2008
Picking - Harder Than It Seems
Picking isn't as easy as I thought it'd be. After further discussion and thinking about it, I've realize how big a project this. There is actually a lot more to it than just simple coordinate retrieving and coordinate conversions.
Now that I've done more reading and researching into this, there is a lot more work to do before I can complete this project. For example, from reading, I found out about the mathematics involved and the stages involved in 3D programming. The picture below shows the stages a 3D object needs to go through before it can appear as 2D object on our screen.

(Source from www.glprogramming.com)
With the vertices of a 3D object, it needs to go through the following transformation in order:
1) Viewing Transformation
2 & 3) Projection and Viewport (Any order)
4) Modeling Transformation
From understanding this, I would most likely need to go back to my 0.2 and fix some of the work. Because now that I understand these stages, I realize that what I have done, was just turned the windows coordinate of the mouse, and converted to perspective view (projection) but not 3D (modeling).
Now that I've understand theoretically what needs to be done, I need to go back, fix my mistakes, and put the rest to work.
Monday, November 17, 2008
Canvas 3D Picking 0.2 Release
So far, everything has been going smooth. The beginning was a bit slow due to understanding what's been done already and how the structure of the code works, but it's worth the time to spend on. Things that's been completed so far:
- Managed to catch the mouse click event when it's on the canvas
- Able to convert the mouse coord to be relative to the canvas (mouse coord is relative to the window browser, therefore it needs to be recalculated to be relative to the canvas)
- Converted the mouse coord to two 3D points in the canvas (near clipping plane and far clipping plane)
- Added function to Model class to return it's vertices
- Added function to return the bounding box's vertices (might need some more work)
The project details and updates can be found here
Now to continue pressing on hard and get that 0.3 done~!
Thursday, November 13, 2008
Project Changed: Canvas 3D - Picking
It's a little late in the term, but I've decided to change project. After discussing with Dave about how my previous project wasn't going anywhere, I've decided to make a switch.
I was looking through the remaining list of potential projects and unfortunately, none was appealing to me anymore. So I decided to talk with Cathy and see if there's any projects she has for Canvas 3D. Luckily, there's a project for Picking.
One thing I liked right away for this project is that I'm actually going to be doing lots of coding =) That was something I found lacking in my previous project.
To put the project description simply, what it does is that when you click in Canvas 3D, you will select the object that is in the most front in the current camera angle you are looking at.
So the details of this Picking project is this:
So for my 0.2 Release, I will aim for the following:
And for 0.3 Release:
Wiki Page: Canvas 3D JS Library
I was looking through the remaining list of potential projects and unfortunately, none was appealing to me anymore. So I decided to talk with Cathy and see if there's any projects she has for Canvas 3D. Luckily, there's a project for Picking.
One thing I liked right away for this project is that I'm actually going to be doing lots of coding =) That was something I found lacking in my previous project.
To put the project description simply, what it does is that when you click in Canvas 3D, you will select the object that is in the most front in the current camera angle you are looking at.
So the details of this Picking project is this:
- Convert the mouse coord in Windows to Canvas coord
- In the current scene, find all objects that intersect where the mouse is clicked
- Find the object closest to the camera from the list of intersecting objects
So for my 0.2 Release, I will aim for the following:
- Make functions that will help complete the project
- Model.getVertices() which returns a reference of all the vertices in the object
- mouse coord convert: converting the mouse coord in Canvas coord
- other functions that might come up
And for 0.3 Release:
- Have the project working or at least close to working (with few minor bugs)
Wiki Page: Canvas 3D JS Library
Thursday, November 6, 2008
The 0.2 Release Hurdle
Just when I thought the work on 0.2 has been going smoothly, I've run into a bump now. So here's what's been going on with the 0.2 release.
- been following up on the suggestions posted on bugzilla
- tried using Process Explorer to track process spawned during mozilla build
- research other apps that can log (Process Explorer can't log)
- found Process Monitor
- logged process spawned during mozilla build
- updated bugzilla
At first, when I was trying out Process Explorer, it doesn't seem to do what I needed, but after a bit more tweaking, I finally got it to show the process name, pid, ppid, time, and duration. However, I couldn't find the most important function, which was logging. I mean, that was the main thing I was trying to get - a log of the processes and their info.
So then, I dug around the Internet, and stumbled upon a similar app called Process Monitor. The tool is great, it's the perfect thing I needed. It shows all the things I needed, and I can even filter out what I want to see. The best thing is, I could export the log out in different formats like CSV and XML. But then, the program always crashes whenever I track down the processes during firefox build. Of course, the first problem that came to mind was that maybe it's incompatible with Vista, which usually is the case I find. After doing some reading, found out that it wasn't the case, Process Monitor was are built to support the later platforms. Then suddenly, EUREKA~! I notice that it's trying to show Registry Activity, File System Activity, Network Activity, and Process And Thread Activity. So I thought, it must be lagging so much from all these info it's trying to show that it's crashing. I turned all the others and showed only Process and Thread Activity, tried recapturing during the build, and SUCCESS.
I've posted a brief description of this log on bugzilla (since the CSV log is about 112 MB), and have gotten reply from Benjamin asking for possibly more information in the log, or more accurate data.
So now, I've going back to try and find those data. Hopefully I won't need to find another app to do this.
Tuesday, November 4, 2008
0.2 Further Updates
After looking into Process Explorer even more, I found out that it pretty much does what I needed, it shows the process name, it shows the start time, it has the duration of the process, and it gives the PID. What it's missing and the most important part is that I need is logging. If only it can log and keep a history, then it'd be the perfect tool.
Maybe I can somehow capture the "kill process" event and log it manually. This will require some more investigation on my part. Maybe I'll find another app that will do the "magic" as I do more research.
Maybe I can somehow capture the "kill process" event and log it manually. This will require some more investigation on my part. Maybe I'll find another app that will do the "magic" as I do more research.
Dive into Mozilla Modifying Firefox using Extension Lab
Since I don't work with extension much myself, I've taken the easy way and followed the instructions. At first glance at the instructions, I thought to myself, "Oh man...this is gonna be one long lab".
After finished reading the entire lab, I was still a little confused, so I talked w/ Scott and he help clear things up for me. And now, the lab is clear as day.
I simply had to create 4 files and the right directory structure, copy and pasted the code, and voila, the lab is done =)
Extension file can be found here
After finished reading the entire lab, I was still a little confused, so I talked w/ Scott and he help clear things up for me. And now, the lab is clear as day.
I simply had to create 4 files and the right directory structure, copy and pasted the code, and voila, the lab is done =)
Lab 8
  |-install.rdf
  |-chrome.manifest
  |_chrome
      |_content
           |-addtabbeside.js
           |-overlay.xul
Extension file can be found here
0.2 Update
After being able to identify where (which directories) time was spent during the build, now I am suggested to try figuring out what programs get executed during build and how much time they take up. An extra to that, I will try to log the pid, ppid, start time, end time, and process name during the build.
I've taken a look at Process Explorer and it doesn't seem to do what I need. So now I've been researching on what can get this job done.
I've taken a look at Process Explorer and it doesn't seem to do what I need. So now I've been researching on what can get this job done.
Friday, October 31, 2008
Dive into Mozilla Modifying Firefox Lab
This lab felt like another "Search and Destroy" task. Well...not really "destroy", but change.
I found the searching to be the more difficult part of this lab as we're to look for some old changes that's different from the current MXR. I kind of wished the MXR kept multiple version so we can actually look up stuff in the version we want. But of course, that's asking for too much as there are sooooooo many code that it'll be a hassle to keep different versions for all the code.
After the "target" has been found, the code wasn't hard to change, as it is pretty much given in the lab.
Thoughts about Labs
Labs are very helpful for computer courses as they give you the hands on experience with doing the actual work. However, in my case in this course, I find the labs a little annoying to do since they don't really contribute too much to what I have to do in the course. I'd wish the labs aren't mandatory and are just counted as bonus marks or some how incorporate into our marks to help lighten the mark weight of our other work.
I have nothing against the labs in this course. They're great for helping us understand Mozilla. But when we have to do something that's not really helping with what we're suppose to do, it does get annoying at times.
Thursday, October 23, 2008
FSOSS - TikiWiki
FSOSS, what does it stand for?
Fun Stuff Or Scary Stuff, no, that's not it.
For Students Or School Staffs , nope, that's not it either.
It's 'Free Software and Open Source Symposium'.
I was actually looking forward to it. With all the hypes from the Profs, and the promotion gone into it. And yes, the beer was a possible factor, but I didn't get the free beer =(. Unfortunately, I was only able to attend the morning on the first day of the event. And since I don't really have a good memory, I'll just talk about the experience I had with the talk I remember the most - TikiWiki.
The FSOSS was definitely not scary, and it wasn't just for students and staffs. There were a lot of other people too. How did I know this? Well....to start the TikiWiki talk, the speaker actually asked everyone in the hall to give a brief introduction of themselves and why there were here. When I said all, I meant all, which I find a little ridiculous to do, since they already have a limited time to work with and they were starting a little late.
At least from this, I found out there were all kinds of people there. Students, Grads, Professors, People from Companies, or just freelance people who are interested in learning more about another CMS that's out there. One of the intros I really liked from the group was, "I love Tiki, I Love Wiki, and then there's TikiWiki". Obviously, you can tell that this, and the same with many others, that, they just decided to come to the TikiWiki talk and had no real reason to be here.
Anyways, onto the talk/presentation.
I thought I would be able to actually know what TikiWiki is. Like how it looks, how it works, what it can do, or how it is different from all those other CMS out there. But I didn't get much of any of them. They showed us a list of things you'd do with a CMS and they graded them A to E according to TikiWiki's capability for those tasks. Showed us a tutorial video on how to use the TikiWiki, but it was more like how to create a form and what type of inputs you can use (textbox, radio, drop down, check box, textarea, etc). I didn't really find any of these useful. They're basically things I could have just found myself or easily figure out myself just by playing with the CMS.
Overall, I didn't find this particular presentation to be quite useful or informative.
One thing I really like and made me laugh, or at least smile during the presentation was when they showed the video. In the beginning of the video, there was a label was I found pretty amusing.

Unfortunately, the video didn't seem that smart itself. Maybe it was because they were just skipping to show some parts of the video. But yea, I wish the talk could have been better. Like have more visual of what they're talking about. Show some screenshots of the TikiWiki console, or show some functions or ability the TikiWiki could do, or show some sort of comparison of TikiWiki and other CMS.
Wednesday, October 15, 2008
Interesting Note from Profiling Build
So after having made changes to rules.mk from the config folder I've managed to get times spent in each of the directory while building. To do so, I've basically replaced all the
At first, I found it interesting that I managed to extract 1909 times from the log when there are only 1752 folders (in my build anyways). Upon closer looks, I realized that some of the times are actually a sum of the previous times.
Before I found this, I thought it was gonna be easy writing a program to just add all these times up. Now, I got to do a little bit more thinking before I can add them up properly.
*brings out the good old calculator*
$(MAKE) in rules.mk with time $(MAKE) with a few exceptions.At first, I found it interesting that I managed to extract 1909 times from the log when there are only 1752 folders (in my build anyways). Upon closer looks, I realized that some of the times are actually a sum of the previous times.
Before I found this, I thought it was gonna be easy writing a program to just add all these times up. Now, I got to do a little bit more thinking before I can add them up properly.
*brings out the good old calculator*
Tuesday, October 14, 2008
Progress~!!
Success in finally getting some time~! Thanks to Ted =) After talking to Ted, I've gotten a lot more understanding of the make files. Before, I was still ok with them, understanding generally what's happening in the make files. But after talking with Ted last night, it made a lot more sense.
So now that I've finally gotten some time, I need to analyze, or at least, extract these times and categorize them. Hopefully, this doesn't take longer than I expected.
So now that I've finally gotten some time, I need to analyze, or at least, extract these times and categorize them. Hopefully, this doesn't take longer than I expected.
Thursday, October 9, 2008
Profiling Mozilla Build - No Progress: Need HELP
So, I've been trying to profile the mozilla build for the last 3 weeks, and it feels like I haven't gotten anywhere yet. I mean, I'm able to find out which files to look at, where the rules are, where the config files are, which config files are loaded, how their info is extracted and converted, but I'm still unable to actually TIME some of these process and how long the build spends on each directory/file/command.
The files I've looked at and what my understanding of these files are:
Instead of going straight into timing all the individual directory/file/command, I decided to just try timing how much time the configure file takes. So I went into client.mk, where configure is loaded. This is what frustrated me the most, I've literally spent many hours, trying to just put a single echo or print statement, but it's ALWAYS saying "missing operator" or something along that line. I've tried many ways but none of them seems to really work.
What frustrates me more, is that I can't even tell what language it's actually written. Like for the other files, I can tell they're just shell scripts, which I've done a bit before so I can edit it. But client.mk or any other mk files...... I have no idea how to read or edit them.
I'm like really running out of ideas. I'm literally 2 steps away from what I wanted to do and yet, I'm having so much trouble trying to get through these 2 steps.
I've even tried wrapping the files up in a script to try timing it. It works, but it doesn't really do what I want to do. I've also researched on some of the profiling softwares out there, but either they don't do what I wanted, or I might have missed some really good ones that fits my project.
I'm at a total lost, I need some serious help. I wish I could just get a bit more pointers in how I can do this. What's even better is if someone can tell me exactly what I need to do or show me some samples so I can actually learn from it.
The files I've looked at and what my understanding of these files are:
- client.mk: used to calling all the necessary config files and building
- mozconfig2configure: picks out the ac_add_options from the .mozconfig
- configure.in
- configure: calls on config, checks system, load cahce file, and create files/directories
- rules.mk
- mozconfig2client-mk: picks out the mk_add_options from the .mozconfig
- mozconfig-find: finds the .mozconfig file
Instead of going straight into timing all the individual directory/file/command, I decided to just try timing how much time the configure file takes. So I went into client.mk, where configure is loaded. This is what frustrated me the most, I've literally spent many hours, trying to just put a single echo or print statement, but it's ALWAYS saying "missing operator" or something along that line. I've tried many ways but none of them seems to really work.
- echo Testing
- @echo Testing
- echo "Testing
- print Testing
- print "Testing"
- print("Testing")
What frustrates me more, is that I can't even tell what language it's actually written. Like for the other files, I can tell they're just shell scripts, which I've done a bit before so I can edit it. But client.mk or any other mk files...... I have no idea how to read or edit them.
I'm like really running out of ideas. I'm literally 2 steps away from what I wanted to do and yet, I'm having so much trouble trying to get through these 2 steps.
I've even tried wrapping the files up in a script to try timing it. It works, but it doesn't really do what I want to do. I've also researched on some of the profiling softwares out there, but either they don't do what I wanted, or I might have missed some really good ones that fits my project.
I'm at a total lost, I need some serious help. I wish I could just get a bit more pointers in how I can do this. What's even better is if someone can tell me exactly what I need to do or show me some samples so I can actually learn from it.
Wednesday, October 8, 2008
Thunderbird Bugzilla Lab
Due to the nature of my project, I don't actually come in contact with debugging a lot. So this lab has become my first real attempt at debugging Mozilla, and it wasn't as scary or difficult as I thought it'd be. Thanks to this lab, I've had a nice experience in coding and filing patches.
The bug report I made on Bugzilla has been posted here: Bug Report and on my Wiki page
The patch to the email problem is posted here: Bugzilla and Wiki
The process for fixing the bug was pretty much the same as any programming debug.
1) Find the source of the bug - MXR or the "Hint"
2) Trial and Error to fix the code
3) Test
And now, the problem has been fixed, and I'm done with this lab =)
Monday, October 6, 2008
Pointed in the right direction, still many obstacles to overcome
So, I've finally found where I should be looking, or rather, I've been pointed to the right files by Ted =) Thanks Ted, you save my life from reading all those other files =)
Now that I've been pointed to the right files, I tried to put some echo into them to make sure they're the right files for me to poke around with. Not much luck there for some reason, so now I need to spend a little more time, testing, poking around, and reading code before I can make more progress in my project.
Now that I've been pointed to the right files, I tried to put some echo into them to make sure they're the right files for me to poke around with. Not much luck there for some reason, so now I need to spend a little more time, testing, poking around, and reading code before I can make more progress in my project.
Saturday, October 4, 2008
Building Mozilla Using Gold Linker
Earlier, I saw on the Contrib Opportunities page that they wanted someone to test out the Gold Linker with the Mozilla build. Since I had to build, build, and build some more on Mozilla, I thought I might as well build it with the gold linker and test it for them. So after I've got all the necessary components installed, I tested the build with and without the gold linker on Ubuntu in my VirtualBox.
My machine is a 2.0 GHz Duo, with 4GB ram, and a 7200rpm Harddrive running Windows Vista Business edition. The profile I set for Ubuntu on VirtualBox is 1G Ram. In the .mozconfig file, I had the following settings:
And the build times - all from scratch - I've got was this:
I hope this helps Dave and Ted.
My machine is a 2.0 GHz Duo, with 4GB ram, and a 7200rpm Harddrive running Windows Vista Business edition. The profile I set for Ubuntu on VirtualBox is 1G Ram. In the .mozconfig file, I had the following settings:
   mk_add_options MOZ_OBJDIR=@TOPSRCDIR@/../obj-@CONFIG_GUESS@
   ac_add_options --enable-application=browser
   mk_add_options MOZ_CO_PROJECT=browser
   mk_add_options MOZ_MAKE FLAGS=-j5
   ac_add_options --disable-ogg
And the build times - all from scratch - I've got was this:
With Gold Linker (2 runs)
Real 48m 03.693s    44m 57.422s
User 23m 57.074s    18m 49.275s
Sys  21m 46.282s    23m 12.551

Without Gold Linker (2 runs)
Real 42m 50.664s    47m 31.936s
User 17m 26.149s    32m 35.010s
Sys  23m 39.225s    12m 24.479s
I hope this helps Dave and Ted.
Thursday, October 2, 2008
Bugzilla
So...I've tried finding some bugs related to my project, but unfortunately, there aren't any. It was expected though, since my project is mainly trying to find out why the build time on Windows is so long.
Although I was unsuccessful looking for a thread to CC myself from bugzilla, I have been getting messages from this other thread I've been looking at about 'The Build System'. I'm assuming the main idea is the same as doing it on Bugzilla.
It's actually quite surprising how many messages are posted each day for a single topic/thread. And it's not some 2-3 sentence replies, there are actually lots of useful/descriptive replies each day. You might not find the info to be useful specifically to your problem, but, there are lots of good information from these posts.
Sweng-Gamedev
Contribution
I've finally made a contribution~!
My project was easy enough for everyone to contribute to. I mean, it's something they needed to do anyways, might as well time it and submit it as a contribution.
And now, I've finally gotten a chance to contribute to someone's project. I made a simple webpage which resizes the window. So now, I hope the testing gets easier for Tony =)
Add an Infobar style warning for window resize/move
Friday, September 26, 2008
Reading code is not as easy as it seems.
Reading client.mk and configure has been quite the tough task for me so far. Why am I even trying to read them? For my project of course.
At first, I thought that putting the 'time' command for each of the command called during the build would be an easy task. I was thinking, I'm sure they put all those call in some sort of loop and I can just put the 'time' in there in front of the calls. Oh boy was I wrong.
I started with trying to do some simple output in client.mk file to see if I was working with the right file for the build. Not much luck there, editing the client.mk was trickier than I thought it'd be. Just trying to read and find out where I should put the output took longer than expected. And when I finally found a place I think was a good spot, I tried putting some printf commands, echo commands, whatever commands it seems like it would take to output something on the screen, but whatever I tried, I always get the "separator missing" error. That was really annoying me. And when I finally got that error fixed, I can't see my output anywhere when I compiled.
So then, I thought maybe I'm not editing the right file, so I took at a look at the build output and see if it's reading some other files to make the calls for building.
Now I moved from reading client.mk to configure. What a big change it was. Reading from a file that's 410 lines to a file that's 22910 lines. Just seeing the line number was intimidating enough.
So before I continue trying to read configure, I'm going to ask around to make sure I'm looking at the right file.
Thursday, September 18, 2008
Need Contributors for OSD/DPS Project
I'm working "Profiling the build system" project and I need everyone's help.
When you run your Mozilla build, can you kindly go to my wiki project page and just put down your build time.
Wiki: Profile the build system
When you run your Mozilla build, can you kindly go to my wiki project page and just put down your build time.
Wiki: Profile the build system
Tuesday, September 16, 2008
Mozilla DevDay
The sessions for the developer day had been quite interesting. There were so much info and so much to try and absorb. The Mochitest, Tinderbox, and all the other different tools used for debugging; Tests written in different languages and tests used for different formats (js, css, html). Interesting as it is, it still seem just a bit too much for someone who's just diving in to the Mozilla project for the first time.
There were lots of terminology, lots of technology, and lots of people who were being mentioned throughout the sessions, so unless you've done some prep work, or you've been involved, it's kind of hard to really know what's going on.
On a good note, it was really nice to get the opportunity to actually talk with some of the developers in person. I personally find that much better than chatting on irc all the time.
Specifically someone I talked with was Ted Mielczarek. Although we only talked for a bit and it was mainly about the Profile Build project, I could already tell he's a pretty cool guy and I can easily approach him if I ever run into any problems.
Setting Up Machine to Build FireFox
Trying to get the build environment has been very frustrating, especially on VISTA. I don't know if it's VISTA, or if it's the school's internet, but just trying to get the SDK to install has been really frustrating. Whenever it tries to locate the installation file off of their site, it failed to locate it and then the setup.exe just freeze and crashes. After many attempts to figure out what's wrong and re-trying the installation, I finally gave up and asked Dave to see if he could shed some light on this matter. After a quick talk with him and Ted, we then realize that it MIGHT be due to being on the school network that's preventing the download to work properly. Hopefully this is the cause of it. Now I just have to wait to get home and try it again.
Installation Success~! Note to self, if download fails at school, try again somewhere else. Now I can finally try building FireFox and look more into my project.
Installation Success~! Note to self, if download fails at school, try again somewhere else. Now I can finally try building FireFox and look more into my project.
Tuesday, September 9, 2008
Ubiquity = AWESOME
I must say, I am very impressed with this extension on FireFox. It's like the perfect tool for lazy people like me. Surfing the net is literally at the tips of my fingers now. I know it might sound ridiculous to some of you, but....I've made commands to go directly to the OSD Weekly schedule page, the Planet blog page, my blog page, opening ChatZilla connected to moznet, and linking to printable version of any wiki page you're currently on. Ok....the last one sounds useful, but the rest sounds pretty lazy to you, right? But not to me. I'm lazy enough to not want to go through my bookmarks and clicking the link to those pages, instead, I'm just going to type a few letters and get to those pages.
Install Ubiquity: extension
Ubiquity Tutorial: Read
Here is the code for the commands I mentioned above:
CmdUtils.CreateCommand({
name: "irc",
author: {name: "Patrick Lam"},
icon: "https://addons.mozilla.org/en-US/firefox/images/addon_icon/16",
preview: "Starts ChatZilla 0.9.83 and connects to irc://moznet/",
execute: function() {
Utils.openUrlInBrowser( "irc://moznet/" );
}
})
CmdUtils.CreateCommand({
name: "blog",
author: {name: "Patrick Lam"},
takes: {"user": noun_arb_text},
icon: "http://pplam3.blogspot.com/favicon.ico",
preview: "Goes to Blogspot by default or to the specified user's blog",
execute: function( directObj ) {
var preText = "www";
if (directObj.text != "") {
preText = directObj.text;
}
Utils.openUrlInBrowser( "http://" + preText + ".blogspot.com" );
}
})
CmdUtils.CreateCommand({
name: "osd",
author: {name: "Patrick Lam"},
takes: {"blog": noun_arb_text},
preview: "Goes to OSD600 Weekly Schedule. By typing 'blog' after, it goes to the Planet's Blog",
execute: function( directObj ) {
if( directObj.text == "") {
Utils.openUrlInBrowser( "http://zenit.senecac.on.ca/wiki/index.php/DPS909_and_OSD600_Fall_2008_Weekly_Schedule" );
}
else {
Utils.openUrlInBrowser( "http://zenit.senecac.on.ca/~chris.tyler/planet/" );
}
}
})
CmdUtils.CreateCommand({
name: "print",
author: {name: "Patrick Lam"},
preview: "Takes the current wiki page and make it printable",
execute: function() {
var currentPath = CmdUtils.getDocumentInsecure().location.href;
var wikiHome = currentPath.substring(0, currentPath.lastIndexOf("/"));
/* Gets the title of the document in wiki */
var wikiTitle = currentPath.substring(currentPath.lastIndexOf("/") + 1);
/* Makes the printable version url */
var printURL = wikiHome + "?title=" + wikiTitle + "&printable=yes";
Utils.openUrlInBrowser( printURL );
}
})
Potential Projects
# 4.9 Modify Firefox to handle files downloaded to Temp more appropriately
# 4.16 Profile the build system (why are my Windows builds so slow?)
# 4.20 Add an Infobar style warning for window resize/move
It really is hard trying to pick only ONE project out of the list. So many of them seem so interesting. I wonder if it's possible to work on multiple projects...wonder how much work that's going to be too...
Project List
Festival Intro = Lecture?
Was it just me or did the video seem to be focused more on the festival more than about getting started with Open Source? The analogy used was pretty good, but too much time was spent on explaining what the festival is.
I was at a bit of a lost through... pretty much most parts of the video. The whole time, I've been thinking, "is this the right video? It should be, I see Dave...Maybe it's something I missed, I'm sure it'll get back to open source." Until eventually, I see the connection between the festival and the open source. Even then, the talk seemed more focused on the festival more than anything else.
The festival was a good analogy to use, I mean, you have lots of people in the community, you're being overwhelmed with the surrounding, and not knowing what's going on. But was it necessary to spend half the lecture time talking about the festival? I hope the lecture was more focused on open source, like the Revolution OS video or even our 1st lecture.
Nonetheless, I did endure it and watched the entire lecture including the QA section. And I must say I appreciate the time and effort Dave puts into the OSD classes, renewing the material every term. I wish all classes renew their materials every term too.
Getting started in Open Source projects, or "Learning to be at the festival" (on-line lecture) by David Humphrey (given at Mozilla24 in Stanford): mp4
Thursday, September 4, 2008
The Cathedral and the Bazaar
Cathedral style, Bazaar style, they both have their good and bad points. But back when Linux first started, the Bazaar style was a new concept in that period, something unheard of or unthinkable. Everyone thought it would end in a disaster. To everyone surprised, not only did Linux survived through this disastrous idea of the Bazaar model, Linux has become quite successful because of it.
I am actually a little surprised myself how successful the Bazaar model works. I mean, I can understand how much easier it is to find bugs and fix these bugs, but the thought of how all these thousands or millions of co-developers making fixes or changes on their own, can come together with such few problems, just seems like a miracle.
This is basically comparing a safe and sturdy way of programming against a fast and risky way of programming. It was a bit of a gamble for Linux to use the Bazaar style, but it paid off.
Revolution OS - History and growth, Free vs Open.
As much as I hated documentary videos, Revolution OS running at 1 hour and 25 minutes, wasn't as bad as I thought I would take it.
Before I watched this video, I hardly know anything about GNU/Linux. The history spoken by the founders and early contributers has given me a well understanding of how it all began. From an OS made for personal use, to being used by a small group of people, and finally to being used by over 12 million people. Just from knowing the history, it had made me realize again, how if you make something good, it can go big. I mean, look at Linux, in just a couple of years, the success of it has exploded.
The Free vs "Free" concept was a little mind boggling at first. I mean, if it's free, it's free, what more is there to it. I guess it was just a wrong choice of word to discribe it. When you hear "free", everyone would automatically think free as in 0$, that's just how we are, especially when you call it "Free Software". If they renamed it as "Open Source" sooner, I would think their success could have boomed a lot sooner.
As an end, I must applaud their "Free Software Song". I really didn't think they would have that coming. Along with the history, the definitions, the concepts, and some inside stories, this documentary was quite amusing and fun to watch.
If you watch and listen carefully enough, you might catch some of the jokes they try to make.
Tuesday, September 2, 2008
First Class
The first day of class was pretty interesting. We've gotten a general idea of what we're expected to do for the term and we're introduced to Mozilla and OpenOffice.
So far, this class has been at a faster pace than my other courses this term, and I must say, I'm rather glad it is.
The only thing that concerns me right now are the blogs. I'm not much of a writter myself, so, having to write two entries each week will require a little more brain power and creativity than usual.
Subscribe to:
Posts (Atom)